latest News

Does Barefoot Running Cause Calf Pain? - Xero Shoes
People making the transition to running barefoot or in minimalist shoes sometimes experience calf pain or even calf injuries. They can also feel pain in their Achilles tendon.I have talked with plenty of people who assume this kind of pain is just part of the transition process from running in typical running shoes to running barefoot or in minimalist shoes.If you’ve heard this, too, I have good news for you:Pain isn’t a necessary part of the process!I like to say “calf and Achilles pain is optional” (if you know what to do).I am going to first give you an overview of why runners might experience calf pain in the first place before turning to barefoot running and why I think the conventional wisdom here is wrong.Why We Get Achilles Tendon and Calf Pain when RunningYour calf has a set of muscles (including the gastrocnemeus and soleus muscle) that connect to the Achilles tendon and provide both the power for pushing with your foot, as well as controlling how your heel comes down to the ground if you land on the ball of your foot.The most basic reason runners experience calf pain is overworking the muscles and tendons.This can happen for a variety of reasons. In some cases, it is because they were used to apply an amount of force the muscles are not used to. For instance, if you’re used to running on flat surfaces but then go for a run on a hill, your calf muscles are going to be working a lot harder than usual. This can also happen with a sudden increase in distance.In other cases, it isn’t that the force is too much but that it goes on for so long. To put it differently, the muscles are pushed past their point of endurance.Sometimes, a runner’s calf muscles have simply been asked to work before a proper warm up or stretch. Tight calves that are suddenly put to work places a lot of strain on the muscles.Whatever the reason, pain is your body’s way of telling you that your muscles need a rest, and that you probably need to use your calves differently once you’re feeling better.Sore calves are a normal effect of exercise and nothing to worry about. Severe calf pain, on the other hand, is an indication of a more serious problem. If you overwork your calf muscle, you risk injuries like a calf strain or even a calf tear. Muscle tears are painful and can require a long recovery process.In short, then, tendon or calf pain is an indication that you’ve overdone it in some way.Why People Assume Calf and Tendon Pain Are Just Part of Barefoot RunningWhen you run barefoot, you run differently than if you’re in typical shoes (get tips on how to run barefoot here). Generally speaking, runners who are used to thick, modern running shoes will tend to land heel first with their foot contacting the ground well in front of their body.Once making the switch to either no shoes or minimalist ones, most runners will probably stop landing that way. Why? Because it hurts to land on your heel!Instead, barefoot runners will tend to adopt a mid-foot or fore-foot strike pattern, landing with the heel initially off the ground. In that running form, the calf muscles act as shock absorbers, controlling the speed with which your heel comes down to the ground (or near it). This “eccentric” or “negative” loading can place greater demands on calf muscles and tendons than they used to.It makes sense, then, that transitioning to barefoot-style running could lead to overworking of the calf muscles and therefore to calf pain and soreness.Most people think the issue is that the calf muscles are too weak because of previous underuse and the solution is to make the calf muscle stronger.In other words, people believe that calf and Achilles soreness is practically inevitable when you try running barefoot, and that building strength is the eventual cure.But that story is missing something important.Why Calf and Tendon Pain Are AvoidableI say that it is missing something and not that it is totally wrong.It is true that barefoot running usually means a new (and more natural) running technique that can place more demands on the calf muscle.But this doesn’t need to lead to calf pain when running.The most common problem many runners have when they begin to run barefoot is that they simply use more effort than necessary when they run.Consider that there are two ways to keep your calf muscles from being overworked: to have stronger muscles for a given amount of work or to reduce the work required. Runners usually assume they need to do the first thing – build up their calf muscles with strengthening exercises.From what we’ve seen, having heard from tens of thousands of new-to-barefoot runners, the “secret” to reducing your odds of having calf pain is to do less and relax more.So let’s take a deeper look at this other option: to prevent calf pain or calf injury by reducing the amount of work you ask your calves and Achilles to do.The Common Mistakes Barefoot Runners MakeOkay, so how do we do less and relax more?It all comes down to form.New barefoot runners often have two other habits that put unnecessary strain on their muscles and tendons, putting them at risk of calf muscle injuries:Overstriding while landing on the mid-foot or ball of the footMost new barefooters hear that you should land on the ball of your foot, or on your midfoot.It’s true. BUT, the mistake many make is using the same form they have in regular shoes – landing with their foot in front of their body (“overstriding”), and then merely pointing their toes.When you land with your foot further in front of your body, you’re basically “putting on the brakes” which puts excessive force on your foot.If you point your toes to land on your forefoot, you use your calf and Achilles to decelerate and this amount of force is more than most people’s calves can handle. In fact, it’s more than the bones of your foot are made to handle so you’re also risking a stress fracture.Sure, getting freakishly strong may make that easier to do, but the correct solution is to “stop putting on the brakes” when you land by stopping your over-striding and, instead, placing your foot more underneath your body when you land.By not applying that breaking force, your calves don’t have to do as much work.One way to learn to land with your foot underneath you is by increasing your cadence – the number of steps you take per minute – without running faster. This quicker cadence makes it harder to overstride.There’s actually a recent study on this. Researchers found that runners with a history of recurrent calf strain injuries land with their heels further away from their center of mass.Pushing OffSimilarly, if you remove your foot from the ground by pushing off with your toes, you’re essentially doing bodyweight calf raises every time you take a stride… and even a short run would be more than your body can handle.Again, the solution isn’t to hit the gym to lift weights or cross train to improve your calf raise strength. It’s to LIFT your foot off the ground (instead of pushing) by flexing at the hip.I know that sounds weird, so let me give you an image to help it make sense:Imagine what happens if you stepped on a bee and it stung your foot… you wouldn’t try to push away from the ground since that would drive the stinger further into your sole. You would reflexively (faster and easier) pull your foot from the ground with a hip flex.You want to use that same hip flex to get your foot off the ground when you run. You’re still using your calf muscles, but not nearly as much as you do by “toe-ing off.”How to Find the Right Running Style that Won’t Lead to Tendon or Calf StrainIn order to use less effort, you’ll probably have to start with less running.That’s fine.Even when you make the adjustments I just described, barefoot running will have you using your lower leg muscles in new ways that will take some time to get used to.The key thing at this early stage to prevent calf injuries is to be patient and listen to your body. Calf tightness isn’t something to worry over. Make sure you are warming up with some calf stretches to keep loose.On the other hand, sharp pain in your feet or calves, shin splints, calf strains — these are all clear messages from your body that something isn’t right. You may even find that you are getting calf pain in your left calf but not your right calf. That can be an indication that you are getting it right with one leg but not yet the other.If you are willing to take it slowly and make adjustments, it is just a matter of time before you find the running form that will feel easy and fun.And you’ll find that you will be able to run your usual distances and times sooner than you think.By the way, it isn’t just calf pain that is a potential issue. Running injuries like plantar fasciitis and shin splints are common, and researchers suggest an important risk factor is increases in the volume or pace of training. Injury prevention requires respecting your body’s limits.By the time you figure everything out, you will probably have gained any extra strength you need.Barefoot Running…in Shoes? I have mentioned minimalist shoes in this article about running barefoot and calf pain. Maybe that confused you. If so, let me explain.Barefoot running is all about recovering a natural running form that allows our bodies to function the way they are designed. It seems obvious that doing what’s natural is better for our bodies. It’s also a lot more fun. It’s really more about how your feet move than about what you have on them.It’s about the form, not the footwear.There is a relationship between the two, however. Minimalist shoes (also called barefoot shoes) are designed specifically to give you the flexibility and feedback that let you maintain natural movement without you having to walk around in bare feet. So you can absolutely try barefoot walking or running without having to ditch footwear, as long as it’s the right footwear.We’ve put together a handy tool to help you find the perfect pair of barefoot shoes (or sandals) for you. Why not have a look?The content of this post does not constitute and is not intended to be a substitute for professional medical advice, diagnosis or treatment. Always seek the advice of a physician or other qualified health provider with any questions or concerns you may have about your health or a medical condition.

This baby means business... bare footed business
I totally want to work for this kid!

Do you need to call the Superheros of Health?
We take a break from our usual chat about barefoot running and walking for this:I don't think it's much of a confession to say that I'm a total health and fitness geek.I love keeping up on the research about strength training (most recently: power factor training), diet (my latest obsession: resistant starch), supplementation (lately: nothing), and anything else that could improve the quality of my life.So, I was a kid in a candy store when I heard about "The Superheroes of Health"Amber Rogers, from gokaleo.com has put together an incredible collection of 23 ebooks and audios that dig behind the mythology of health and fitness. Some of my favorite writers/researchers are in the mix. In fact, I already owned 3 of the ebooks in the Superheroes of Health collection. But that didn't stop me from buying the whole package ;-)I hope that you get introduced to some great people, including Armi Legge, Chris Highcock, Alan Aragon, Amber Rogers, and a LOT more. And, more, I hope yu get some great value out of the info that Amber has put together for you.And now, back to our regular barefoot running shoes programming ;-)
Can you run long distance in sandals? You bet!
There's nothing I find funnier than when I'm running in my Xero Shoes sandals and someone asks, "Can you run in those?"Uh... you're WATCHING me run in them!Well, when I tell non-runners that some people run 100k ultramarathons in huaraches, they're incredulous.Now I don't need to explain anything, I can just show this video of the La Ruta Run, a 50k and 100k race that took place in Costa Rica. Arguably, La Ruta is the hardest trail ultramarathon in the world.Check it out... but be careful. This video will make you want to run La Ruta!Oh, and look at the 4:18 -ish mark for Jonathan Sinclair and Melissa Gosse running La Ruta in their Xero Shoes! Hear them talk about running La Ruta here.And check out the women running in their cheap plastic sandals!

The one reason to avoid barefoot running
Look, I'm the first one to say that barefoot running isn't for every person under every circumstance. Granted, I'll say that it's great for almost everyone, almost all of the time.But every now and then, you need a pair of shoes.Certain restaurants or businesses require SOME form of footwear (one of the reasons we developed Xero Shoes, in fact).As a sprinter, I wear sprinting spikes when I need to run full speed on a track.But this may be the best reason to wear shoes: When you need to open a bottle of wine and don't have a corkscrew... or just want to show off in a geeky-nerdy way:Oh, and if you're out on the trail and don't even have a wall, how 'bout a tree? (BTW, this video is WAAAAAAY funnier than the first ;-) ).Will this work with a pair of Xero Shoes? Who's going to be the first one to make a video and answer that question?

The truth about barefoot running finally revealed in an Infographic
Finally, all the statistics and information about barefoot running you need to know.Enjoy! And SHARE!(click to see full size)Here's my commentary on the infographic :-)The content of this post does not constitute and is not intended to be a substitute for professional medical advice, diagnosis or treatment. Always seek the advice of a physician or other qualified health provider with any questions or concerns you may have about your health or a medical condition.
The ultimate zero drop zero stack height footwear
Two key components of a barefoot shoe (or minimalist shoe) are "drop" and "stack height."Drop is the height difference between the heel and ball of the foot. When you stand on the ground, your heel and feet are at the same height, which means "zero-drop."Stack Height is the thickness of whatever is under your foot.So you can have a zero-drop shoe that's has 1 foot of padding! Not very barefoot.Xero Shoes, as an example, are zero-drop and have a "stack height" of between 4-6mm... about as close to barefoot as you can get.(Flexibility is a whole other issue, but we'll deal with that later.)Here's a photo of the ultimate zero-drop, zero stack height shoe.I think I still might own these socks.;-)
Can I run barefoot in the cold?
I've posted a few times about running barefoot in the cold (or in Xero Shoes)... check out this link, for example. But, inspired by a video I just received from Andreas Cederström in Sweden, I thought you would enjoy this: (Pardon the lag between video and audio... weird Google Hangout effect) You can find Andreas' video on the Xero Shoes Facebook Page So, yes, you can handle the cold if you: Warm up indoors first Adjust your running pattern -- rather than a 5 mile run, do some 1/2 mile loops (getting warm inside between each 1/2 mile and, as you get more acclimated, make slightly bigger loops) Be smart! There are no bonus points for running barefoot on the snow to the point of getting frostbite. Add some toe socks or thick wool socks and a layer of protection, like Xero Shoes. BE REALLY SMART! If you get too cold. STOP! Give yourself time to acclimate -- you'll definitely get better and better at handling the cold over time. SERIOUSLY, BE SMART!!!! (get the hint?) 32-degrees (Fahrenheit) is rarely a problem for me... but ZERO... that's a whole other story. "Dry" powdery snow is way easier to tolerate than wet snow. In other words, adjust to reality ;-) The content of this post does not constitute and is not intended to be a substitute for professional medical advice, diagnosis or treatment. Always seek the advice of a physician or other qualified health provider with any questions or concerns you may have about your health or a medical condition.

Leg length differences and barefoot running
Can you run barefoot if your legs are different lengths?This is a question I get at least once a week. And I think the answer may be surprising.Watch this video that I made with Joshua Gordon about barefoot running technique and leg length issues (and a LOT more). Then leave a comment below with your thoughts.EnjoyThe content of this post does not constitute and is not intended to be a substitute for professional medical advice, diagnosis or treatment. Always seek the advice of a physician or other qualified health provider with any questions or concerns you may have about your health or a medical condition.

Running with the Tarahumara in Costa Rica
Want to run with the Tarahumara (the Mexican tribe featured in Chris McDougall's bestseller, Born to Run)? Well, if you can't make it to the Copper Canyon, or anywhere else for that matter, here's the next best thing. Ultra runners Jonathan Sinclair and Melissa Gosse went to Costa Rica for La Ruta 100k, arguably the hardest trail ultramarathon in the world. About a dozen Tarahumara runners were there and Jon and Mel got to spend the better part of a week hanging out and running with them -- as well as swapping huaraches and Xero Shoes, eating, drinking, and much more. They'll be sharing pictures and stories as well as giving great tips about barefoot running, minimalist running, ultramarathon training, and anything you can think to ask about. You can also click on this link to watch live video chat we had with them a few months ago.
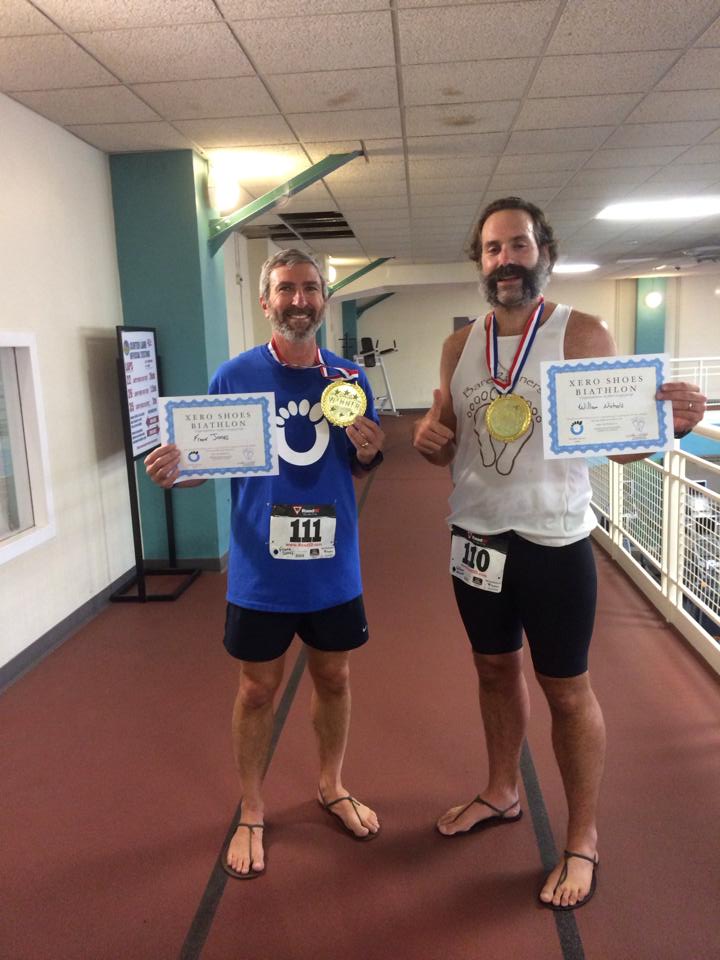
Minimalist Running and Riding - the Xero Biathlon
Want to run a race, but there isn't one scheduled?Want to tackle a biathlon (running and bike riding), but there isn't one in your neighborhood?Want to run barefoot or in minimalist shoes, but tired of people yelling, "You can't do that!" at you?Getting too cold for racing in barefoot-style sandals?Well, Frank Jones and William Nichols solved all those problems: They made their own Xero Shoes race!Here's the report:Inaugural Xero Shoes Bialthlon a Resounding Successby Frank Jones, Bare Runners News Scott Air Force Base, IllinoisAs they made their way to the medal ceremony, the sheer joy of victory remained etched in their faces. William Nichols and Frank Jones had just finished first and second in the Inaugural Xero Shoes Biathlon, sponsored by BareRunners.The event, which took place today at Scott Air Force Base, Illinois, was the brainchild of BareRunners founder, William Nichols. “Southern Illinois is a great locale for a variety of races and athletic events,” he told this reporter. “The goal of today’s race was to highlight and emphasize the healthy running benefits of minimalist running” or “barerunning” as Nichols and his fellow barefoot enthusiasts like to call it. To participate in today’s run, competitors were required to wear Xero Shoes. “The BareRunners love these shoes, and we encourage others to ‘feel the world’ with us!”, Nichols said.The Xero Shoes Biathlon was held entirely indoors at the Scott AFB Fitness Center. It began with a grueling five-mile sprint on stationary bikes. From there, it was a quick transition upstairs for a tough three-mile dash…52 mind-numbing laps around the indoor track! Spectators stood in awe as the competitors completed this epic battle. In the end, Nichols pulled ahead of Jones for an overall first-place finish. “I may have finished first,” he said, “but we are all winners!”Jones, a retired USAF colonel, and today’s runner-up, praised the event sponsors: “I'd like to thank [them] for putting on a great event!” He also credited his training partner, William Nichols, “for training with me, for always keeping me motivated, and for encouraging me to step out of my comfort zone.”Scott AFB Exercise Physiologist, Mr. Al Bromley, credits Nichols and Jones for the blossoming minimalist movement at the air base. “I see these guys every day, and I’m amazed at what they accomplish in these Xero Shoes!” he exclaimed. Bromley has been a strong supporter of the BareRunners, offering support and advice as more and more athletes kick off their shoes and run barefoot or minimalist.Congrats to both William and Frank for an impressive race!Here are some more photos of the triumphant duo.

How to Adjust the Xero Shoes Sandals for a Perfect Fit
To get a just-right fit for your sandals, follow the instructions below. And if you need more help, feel free to reach out to our Customer Happiness Team at 303.447.3100 or support@xeroshoes.mom For all of our sandals, you want to aim for "snug but comfortable." Z-Trek, Z-Trail and Naboso sport sandals Aqua Cloud and Genesis huarache-style thong sandals Veracruz sandal Shortening the laces on the Aqua Cloud and Genesis If you tighten your heel lacing and end up with "too much lace", you can shorten the laces by following these instructions: